Thursday, December 26, 2013

NTS&B Merry Christmas 2013

Another year has passed, and the layout has not progressed much since October. I'd like to wish everyone a Merry Christmas, and Happy and safe New Years.  This year we went to Tenn to see the kids.  Instead of seeing Christmas lights we went ice skating and I messed up my shoulder, so the layout will not progress for a while.

Every year I send out a bunch of Christmas cards to let old friends know we still think of them.  As such, we get a bunch of cards back.   I hate to just put the cards in a box, so a couple years ago I came up with an idea to make a 'tree' to display them and enjoy them longer.  The tree is made up of 2 1x2's painted green, with string ran between the sides to hang the cards on.  There is a bolt at the top, so the tree can be folded up for storage.  Also, had to complete it by adding an angel.


Sunday, November 17, 2013

NTS&B Roaming Trains

As part of assisting on the North Atlanta O Gauge RR Club Piedmont Pilgrimage at Hobby Town, we were requested to bring some trains to run.  Below are a couple pictures on the trains I brought:


MTH RK 8715 CSX SD60M  Loco pulling my Ace HW Tank and HT Box Cars


 Williams Amtrak EMD FO45s Pulling Superliner Passenger Cars

2026 Set Circa 1951-1953 (Actually being pulled by 2037 to preserve 2026).

Sunday, October 27, 2013

NTS&B Forth Piedmont Pilgrimage Open House And Bigville Shaping Up

My forth Piedmont Pilgrimage turned out to be just as enjoyable as my other ones.  I had 4 full time helpers (Roger & Sherry, Bob P, and Les) , and a couple club members came over.  All told, I had 50 people including ourselves, which is smaller than last year, but still a good steady crowd.  We had a couple repeats from last year.  The interesting thing this year was that there were 2 new O Gauge layouts on the tour and both owners said that they were inspired by my layout go build ones of their own.

Of course the week before, I worked my tail off trying to get last minute finishing touches in, mainly on Bigville City Hall and lighting.   Completed adding traffic lights, street lights, ground lights, and building lights, as well as running main control and local control buttons.  Here are a couple pictures of Bigville and City Hall.  City hall has had an air conditioning unit fail, so Traffic is backed up while they use a crane to install a new unit.  The flag lighted on the front of City Hall is courtesy of Jenn.


Tuesday, October 1, 2013

NTS&B City Hall Complete

When planning Bigville, I wanted a fairly large City Hall building.  I decided to use the Kenner's Morotized Girder & Panel and Bridge & Turnpike set form the mid 1960's, that I had recieved as a boy. The panels are quite brittle, so it would not withstand grandchildren playing with the set,  so putting it on the layout was the perfect solution to display it.  I was short a few parts to make the building I wanted, but a friend in the train club had a few extra pieces from a set he had recently disposed of.    The building is lit internally using 2 individual circuits of LEDS, on always on, the other switched on.  The grounds lights are old computer bulbs, that were scrapped in the 1980's.  The flag at the top front of the building was a $ Tree gift from my daughter, that is wired in and alternates colors.


Original Box

Back View

Side View

Front View

Monday, September 2, 2013

NTS&B Starting Year 7

Wow.  Its been 6 years ago since I started the non-Helix part of the layout. Last year saw a little more progress.  I extended the mainline yard and subway by 8 ft, and a 3x4 ft platform for Bigville. (with some help from a couple friends).    Bigville has started growing with the  NTS& B Tower, and under construction City Hall.  The new upper loop and bridge are about complete.  Part of the year was getting ready for the NMRA national convention, and now the next Piedmont Pilgrimage.

My hopes for next year is to complete an 8x10 expansion which will complete the foot print of the layout.   If I don't get started on that, I still have plenty of work to do on Bigville (last building, lighting, stairway), the Mainline Passenger Platforms, and scenery between the layers.


Sunday, September 1, 2013

NTS&B Tower complete

Eventually has arrived (see previous post).  The NTS&B Tower is finally open for business.  Below are a few pictures of the finished product, and the initial paint masking.  The tower started out as a Plexiglas Cylinder that I picked up somewhere while in college.  Its first life in my possession was a lamp with Christmas lights in it.   Now its a 10 story building with an observation deck on top.   The original plexiglass made 6 stories, with various plastic deli containers making up the remaining.  Since the deli containers are very flimsy, I made an internal frame from some scrap Gargraves Track.   Lights are all LEDs from a Christmas string, with a 2K Resistor always on for dimmer night time viewing, and switchable 470 Ohms to add brightness during day.  Building is complete, so now all I have to do is run power to it, decorate around it, create and light 2 more buildings, add street, street lights and small park. add traffic lights, and add small construction scene back in and Bigville will be complete.


I
NTS&B Tower

NTS&B Tower Observation Deck

NTS&B Night scene

Masking started out so vertical bars were painted first

The original masking removed, and replaced to pain horizontal bars. Materials-$3, Paint $5, Masking tape-$15 :)

Monday, July 15, 2013

NTS&B 2013 NMRA National Convention Open House

Made it through the National Model Railroad Association (NMRA) 2013 National convention.  Every one was very pleasant. and seemed to enjoy themselves as much as I did, and went much better than I anticipated.  Not sure I would do it again.  Was a lot of work for the small turnout on Sunday, and the short tour on Monday.

Sunday  was a walk-in open house.  Only had 19 people, which included Kathy & Me, 5 workers, 2 club members,  and 10 additional visitors (which was about what I expected).  Furthest traveled was a couple from Geneva, Switzerland.  Mostly we had a good play session. As usual, whenever we messed up, the visitors would show up.   After the tour, John L added some excitement with his (almost) high flying Rocket GG1.

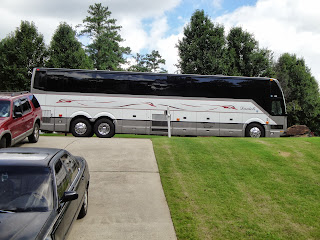
Monday was an organized bus tour.   It arrived about 15 minutes early, which was even before the trains were running.   We had 32 people total, which included Kathy & me, 5 workers, and 25 visitors (the complete bus load).  Needless to say, it was 'slightly' crowded.  The tour stayed about an hours, which was 10 minutes longer than scheduled, but still left ahead of schedule.  Furthest traveled was from Australia, although I didn't get a chance to talk to them.  Here is a picture of the bus that pulled up outside the house on Monday.


Saturday, July 6, 2013

NTS&B Phase 4 Bigville under construction and staged for NMRA Convention

Construction of the city of Bigville has officially started.  Shown is the start of a Girder and Panel building from my set from the 1960's.  Construction is delayed until after lights have been installed which will be after the open house for the NMRA 2013 Atlanta convention.   Instead of progressing on the building, a construction scene was staged for the convention.

Girder and Pane set building started 

Staged construction area.  The cylinder will eventually be painted as a sky scraper

Construction crew is hard at work.  The crane is a Lionel and came with a 6828 flat car early 1960's 


More staging

Overall layout picture

Sunday, June 16, 2013

NTS&B Phase 4 Bigville platform constructed and mainline track laid in

The Bigville platform has now been primed and put in position.  The mainline track has been permanently installed under Bigville, and temporarily ended.  A temporary 0-34 loop was added to the added to the outside mainline, so now continuous operation can occur. 


Sunday, June 2, 2013

NTS&B Phase 4 Fall Level underground section complete

The track work, walls, and lights are completed in the lower level.  Now I  can start on the mainline track and make the Bigville platform.  Here are some pictures on what the lower level of the new extension looks like.

Walls and lights installed

Secret Head Quarters

Ready to put the mainline 'lid' down

Mainline benchwork attached

Current Size

Saturday, May 11, 2013

NTS&B Phase 4 started

A couple friends wanted to help work on the layout, so last weekend they came over and we built 2 modules.  I started out the weekend and week before taking out the temporary turn-around at the end of the yard.  Wayne, Paul, and Paul Jr  spent most Sat building the 2 3x8 modules, and Paul Jr got one of them painted.  I have been working since then to get the legs under it, finish up the painting, lay the trackwork, and get he second layer supported.  Here are some pictures of the help, and how the new modules currently look.

 The help.  Hard at 'work'

 Hey, somebody's got to do the work !

 'We got legs, and know how to use them' (kind of).  Lower module installed.

 Lower module with track installed. Probably the last time this portion will be visable.  Unpainted part is new temprary turn-around.  Perminent modules probably won't be until after Jul or Oct.

View with both layers installed.  Still have skirts, under layout, upper level support, track to install, etc

Friday, April 26, 2013

NTS&B New Overhead Bridge Complete

Finally got the area under the bridge complete.  Used (too) cheap 2x4 fluorescent light defuser panel, which wouldn't support any weight without bowing.  Had to come up with an edging to help support it (an old curtain rod).  Once that was settled, was able to lay out the scene.  The fishing shacks were scratch built (2x2), and Kathy did the paint job on them.   The scene could be a lot more detailed, but this is all its getting for now.  Maybe someday ...

Nice winter day, the ice fishermen are out in force

Ranger Joe goes to the aid of an Orca whale stranded on the Ice

Scene under bridge.  The fish are running today (My feeble attempt at scenery)

Oops.. Going to be a Long day

Now this fisherman has the right idea.  A nice warm shack

Thursday, March 28, 2013

NTS&B Spring Ceiling Loop almost completed

Finally got all the lights lit, houses wired, trees in, and telephone poles up on the new ceiling loop.  Only things left to do is UNDER the new bridge, and a couple small details above.  Also, most of the ladder work for the layout is finally done.   Am getting closer to the point where I planned to be by last October, but that will probably take another month or 2.   Here's some pictures of the new loop.
Village scene with Kringle's Operating Blimp ride

Raised track for search light car.  Eventually will be illuminating some C130H aircraft flying near the ceiling

Trees along back of track (made from Christmas Garland)

Pine Cone Trees (Idea from Squeekville Raiload in Knoxville)

This Coke billboard was another Christmas present.  (I added the LEDs)

Friday, February 22, 2013

NTS&B 2012 Christmas Present installed

On the NTS&B, the economy is so good that towns just spring up overnight.  Actually, Kathy got me a Lemax Kringles Air Field for Christmas.  It is a blimp with a sleigh under it, and rotates on a wire hook.  I did not have a place on the layout for it that she liked, so decided to add an extension to the new upper loop and build a town around it.  The airfield is so tall, I had to drop the extension down 2 inches so it would clear the ceiling.

The LED Christmas tree is also a Lemax.  The tree and blimp are supposed to run off 4.5V DC, but the tree was so bright I ended up running them off a 2.5 V DC adapter. The houses are all LEDS and run off the same supply. The street lights are $1 Store 3V DC specials.  They were too bright also,  so I ran them 2 in series, and also off the 2.5 adapter.  Using the LEDs kept the current low enough so 1 adapter is supplying all of the devices

Monday, February 4, 2013

NTS&B New overhead loop bridge plans A through C

 I finally got some time to work on the new ceiling loop bridge.  The original attempt (plan a below) was a little too plain for my liking, so I came up with the idea to add an arch after seeing a foot bridge of similar design.  I wanted a fairly low arch since the bridge is supposed to be low to the water and has many supports.  My first attempt for the risers (plan b below) was using the vinyl cord that is used to string beads.  The cord was too 'sticky', and could not be adjusted easily.  This ended up making the arch way to flat.   The final idea (plan c below) was to use 1/8 inch dowels for the risers, which I believe worked quite nicely.  The bridge is now complete, but I still want to put a scene underneath it.


Plan C-Bridge with Arch and dowel risers

Plan B-Bridge with Arch and Vinyl Cord

Plan A - Plain Bridge