Tuesday, December 20, 2016

NTS&B Merry Christmas 2016

Another year has passed, and the layout has progressed quite a bit this year.  The autumn and raised areas are up and running with control panels, lights and accessory wiring completed.  As expected, nothing has been done since the Piedmont Pilgrimage, due to getting ready for the holidays.   We did do our annual trek to Lights Of Life, and took our Grandson this time.  Here are a couple pictures.


Sunday, October 23, 2016

NTS&B Seventh Piedmont Pilgrimage

Our seventh Piedmont Pilgrimage continued to be just as enjoyable as my other ones. Thankfully, I had my usual 3 full time 'helpers' (Roger and Sherry B., and Bob P). All told, we had 85 people including ourselves, which is another record.  Fortunately they were spread fairly evenly over the 4 hour period, so it didn't seem to be overly crowded.  The weather was very nice, so I was surprised we had such good attendance.  I still haven't made it upstairs during the open houses to see how bad parking is.

As usual I worked my tail off for weeks before trying to get last minute finishing touches in, mainly on the mainline and raised section, as you can tell from previous blog entries.  I'm now up to running all 14 loops and the trolley, so I spent about 2 days oiling 27 trains and 30 engines. I am still having minor track issues on the switch tracks in the fall area, but most trains ran on each loop reliably.  I decided to run mostly F units.  I ran the Polar Express, Thomas, Tinsletown loop Christmas engine, and the LionChief 0x8x0, so the kids would have stuff that they are familiar with and could run.

During the open house, I kept having problems on the raised track with the Williams Pensy F3 that ran perfect last year.  I swapped it with an F unit from another track, and then had no more problems. Towards the end of the event,  the trolley ran through the bumper, so we had to shut it down. Bob maintained his perfect track record and had problems with both engines he brought over.  One ran fine until the screw came out of the front truck.  It only took about 20 minutes to find it. The other one wouldn't run at all.  The only other problem was 1 coupler let loose on the long freight train on the main line, and we had a major pileup when the engines came around and met the back of the train. 


From what I could tell, everyone seemed to have a good time.  I know I sure did.  Here's what the layout looked like the day of the Pilgrimage.


Saturday, October 15, 2016

NTS&B A day at the beach


We’ve been working so hard getting ready for the Piedmont Pilgrimage coming up at the end of the month, we all decided to take a day at the beach to rest.  Here is the inlet area with more detail added, but still no water poured.


Friday, October 14, 2016

NTS&B Fall raised area roads and lights finished

Now that the mainline tracks are installed, I can finish the raised area roads and street lights.  Here are the results.


Wednesday, October 5, 2016

NTS&B Some new shelving

Kathy was concerned that I might have more trains than would fit on the layout, so I decided to ease her mind and build a display shelf at the end of the room to hold some of my extra stock.  The shelves are 5 feet wide, by 7 feet tall, by 4 inches deep.  The risers were notched for each shelf.  Each shelf was grooved to fit the wheels, instead of having to add track to the shelves.  I also notched and painted the leftover parts of the shelves and risers, so I can build another shelf under the layout when time and energy permits.

The plan is to be able to switch out from all F3's to steam, or some other combination.   I have the feeling that I may need more shelves to accomplish this though.  Here are the pictures.


Tuesday, September 20, 2016

NTS&B Final mainline section roadbed complete and supported

The roadbed for the final portion of the mainline is finally completed, The roadbed has been painted, 'ballasted', and wooden supports added.  Even the bridges are supported. The outside silver bridge, which Anthony gave me, had to be lengthened to span the inlet.


Friday, September 9, 2016

NTS&B Working on final leg of mainline

Now that the track positioning appears to work, it's time to remove the temporary 0-34 turnaround, and start making the bench work to support the track.  The bench work will be made from 1/2 inch plywood.

 0-34 loop removed, and new mainline tied into end of yard.
It looks like bridges will line up ok.

 Starting plywood roadbed under the track.

 Cutting curves is definitely a trick to get right.

 Roadbed is complete under track, but supported by boxes.

Testing long trains on new mainline which is still supported on boxes.

Sunday, August 7, 2016

NTS&B Starting to lay in final portion of mainline

Finally getting to the point where I can see what the final portion of the mainline is going to look like.  Here are the pictures of the track, supported only by boxes.  I'm also trying to get a feel for the look and placement of the two bridges, and clearances for track underneath and on raised area.


Friday, August 5, 2016

NTS&B Starting Fall Level Roads

Started laying road and parking lot for Funeral Parlor and train station on the fall level.  I used some HO roads that my neighbor donated for the cause for the road, and black craft foam for the parking lot.


Saturday, July 30, 2016

NTS&B Fall Inlet and granite wall

I decided to try still another method to make a wall around the inlet.  I took some 3/4 inch Styrofoam, and created some variations in the wall using a heat gun.  Then I coated it lightly with some Hydrocal, primed it with gray paint, and added a touch of black paint.  Finally I added ground foam and lichen using the 50% white glue and water mix. The other side wall was done using the normal Styrofoam, plaster cloth, and Hydrocal  The walls were then pushed into place with no tape or glue holding them.  For the inlet, I used various shades of blue paint to give it the illusion of depth.  Here are the pictures.

3/4 inch Styrofoam with surface deformed with heat gun,
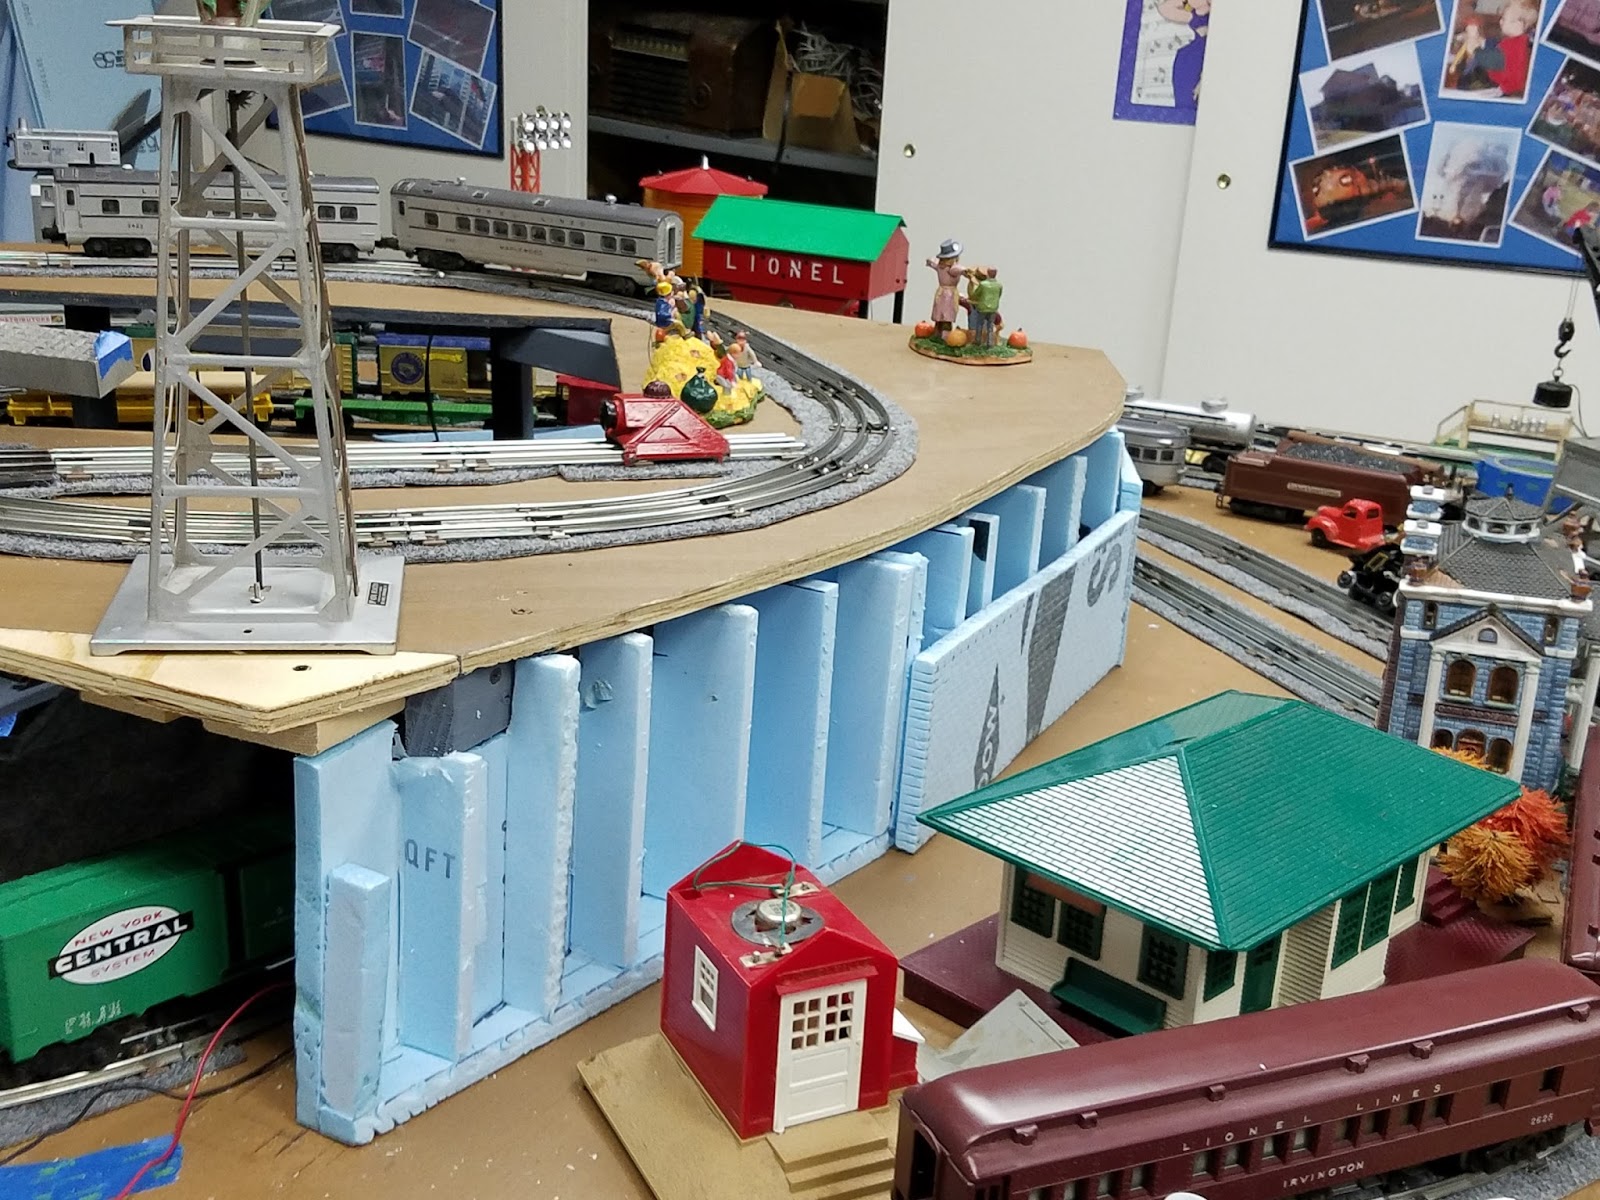
some hydrocal added, primed, and painted

Green paint, ground foam and lichen added

Around the corner, the wall was done with foam and hydrocal.
It turned out to be a good place to place the NAOGRR Billboard.

Inlet was painted, and sand and rock added.

NTS&B Fall vertical wall creation second method

A fellow club member that professional builds layouts showed us how he quickly creates mountains.   He glues layers of Styrofoam together, then uses a wood drill bit in his electric drill, and knocks out chunks of foam using the side of the bit.  Here is my modified attempt.

I started with 2 inch pink Styrofoam used vertically.

Then I used wood bit at an angle to carve out chunks of foam.  
A vacuum cleaner is a must for cleaning up loose foam.

Here is the painted carved wall face.

Then I added lichen and ground foam,

i performed the same basic steps on some 3/4 inch foam,
 but had to be careful to not go through the foam.

Here is the completed pass with both sides installed.

Wednesday, July 27, 2016

NTS&B Fall vertical walls completed

I finally finished vertical walls.  Its taken a little over a month to finish it.  All walls are held in place with either painters tape or hot glue for easy removal.  The following pictures show the basic steps on the first wall, then the remaining walls.

 First plaster cloth was added to area above block walls

Hydrocal mixed with gray paint was spread over the
plaster cloth to cover holes and add strength.

Scenery material was then applied over the hydrocal using white glue
 diluted 50% with water with a drop of dish washing detergent added.

 Other panels completed using same process.


Thursday, July 14, 2016

NTS&B July 4th Parade

While I was hard at work on the fall scenery, Bigville held its annual July 4th downtown parade and showed off their new Chick-fil-A float.

 
 Downtown construction created a tight parade route.

The float was made from a Chick-fil-A stuffed toy, with wires added for the handlers.

Monday, June 20, 2016

NTS&B Fall Vertical Scenery Started

According to my son, I have been remiss in keeping this blog up to date.  I am only about 7 months behind.  Therefore, I am going to back date entries in an attempt to catch up, but it may take a couple months.  I've actually been busy working on the railroad, and not keeping up the documentation.


I finally starting vertical walls in the fall area.  Its been 2 months since last progress.  This long wall was made by hot gluing pieces of Styrofoam together on to a 1 piece bottom and back. The front retaining wall was made using a hot knife to score the indentations to represent concrete blocks, and hot glued to the risers. The following pictures show some of the process.   


 Basic wall insert structure.

 Block wall panels added.

 Close-up of wall with blocks carved using a hot knife.

Section painted with spray paint to add eroded texture.