Monday, May 30, 2011

NTS&B Progress

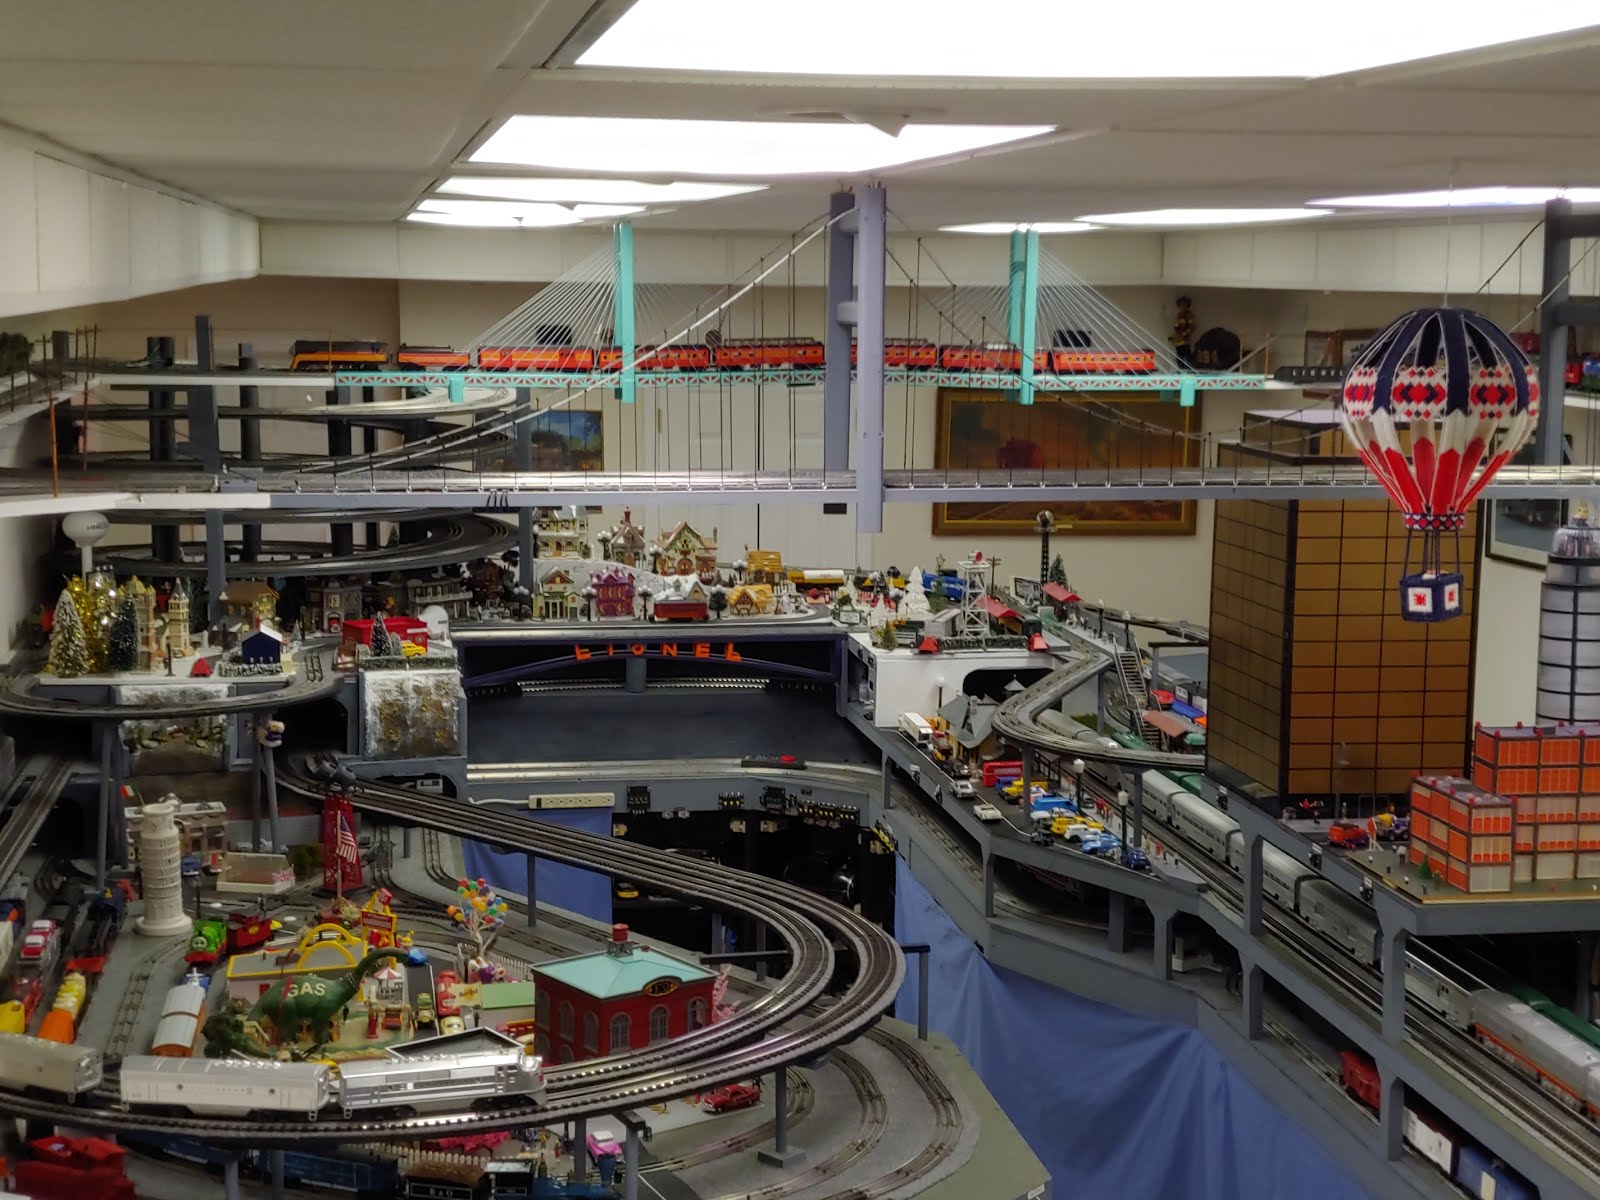
Referring to the previous post. I replaced some of the cardboard between the mainline and winter layers with some of the backdrop material from my Temp Layout. Although this looks much better, I still might go with some kind of plaster between layers to make it look more natural. There is also one clearance issue with Scotties Monster car. If I go with the plaster backdrop, and can make a bit more room. Otherwise I may need to move a track about 1/8 inch, which may cause clearance problems with the next track.

Layer cover using from backdrop from temp layout


Clearance issue. Ohhhhh so close :(

Saturday, May 28, 2011

My Temporary Layout

My temporary layout actually started out in Bristol Tn in the mid 90's. It was then moved to Ga in 1998, and setup in 1999. The idea was to use it for a couple years until the other side of the basement was finished, and a new larger layout started. 12 years later, this has finally happened, and the layout has now been torn down. The layout's life is not totally over. A little of the backdrop will be used on my new layout. The remaining bench work and most of the track will be on its way back home to Tn for my daughter to reconfigure into a new, smaller layout. Below are a few pictures of the layout then, and now.


Tn Layout before moving in 1998


Layout in GA in 2005


Layout in GA today

Thursday, May 5, 2011

NTS&B Some more challenges

It's been a busy month, so not much visible progress has been made on the layout. Instead, I have been concentrating on a couple operation issues. First my friend Scottie brought over a 'little' train car so I could check for clearances. The car is a scale model of a modern Pulp Wood car, and is about 19 inches long, with the trucks right on the end of the car. My clearance checker is about the same length, but has the trucks set back in like a passenger car. His car has much more overhang, so caused me quite a bit of grief. It caused me to move a couple bridges on the outer mainline, and some support for the upper tracks over my figure 8 loop. Other than the inner main line, it will not run on any other loop at this time, and it is doubt full it ever will. A picture of the car, along with 15 inch aluminum and more normal 12 inch passenger car is shown below.

Monster pulp wood car next to 15 inch and over 12 inch passenger car.


The second problem I had I noticed during the last club meeting held here. My winter area accessory lights kept cycling on and off. The problem was caused by 2 houses containing color wheels to give the affect of Christmas lights were drawing too much current. My first attempt at a fix was to run separate power to them, and using an HO transformer to power up only those 2 houses. It turned out that the 2 houses alone were causing too much current for that transformer, also. I then resorted to changing out the light bulbs in the houses. It turns out they were both using high intensity 10 watt halogen bulbs. I swapped them out and used the standard Lionel 'Christmas Light' bulbs that are used in the newer engines, and putting the houses back to the original transformer. The bulbs draw a whole lot less current, and are still sufficiently bright enough to create the desired effect. The picture below shows 1 of the houses with its original light bulb.

Christmas house with original bulb

Thursday, March 24, 2011

NTS&B Two ugly light bulbs for a neat picture

A few years ago, Kathy bought me this neat picture of a 60's diner with parked cars.

The sign and cars all have LEDs in them, and it really looks sharp with the room lights on.

When I hung it in the train room, I discovered the problem that when you shut the room lights off, all you see is the LEDs.

The diner picture was taken at dusk, and the walls behind the picture are white, so it is very dark and hard to illuminate picture without lighting the whole room. After multiple attempts I finally decided to use a K-Line 2 light spotlight tower (#22326), and replace the bulbs with 2 Radio Shack 276-0017 high brightness (7000 mcd), low angle (30 degrees) LEDs. The result is shown above.

I started out with 2 burnt out light bulbs. I broke the glass out of them using a pair of pliers held in a trash can and wearing safety glasses. I put a piece of small diameter heat shrink over the wire going to the center post of the socket and soldered one side of the LED to the wire. I placed another piece of heat shrink over the other leg of the LED, and soldered a 2.2 K Resister to it. Then I soldered the other end of the resistor to the outside of the socket. I did not shrine either piece of the heat shrink, which allowed me to push the LED into the socket while keeping the wires insulated. The results was one ugly light bulb !!

I then screwed the LED into the light tower socket. I cut a piece of large diameter heat shrink (shown), and then placed it on the LED (no heat) so only the front of the LED is visible.

A view of the light Tower from the front. Notice the LEDs are very focused, with very little light from the reflectors. The left one does not have the heat shink sleave applied, and there is still very little light bouncing off th e reflector. The tower is in approximately where it will be permanently located.
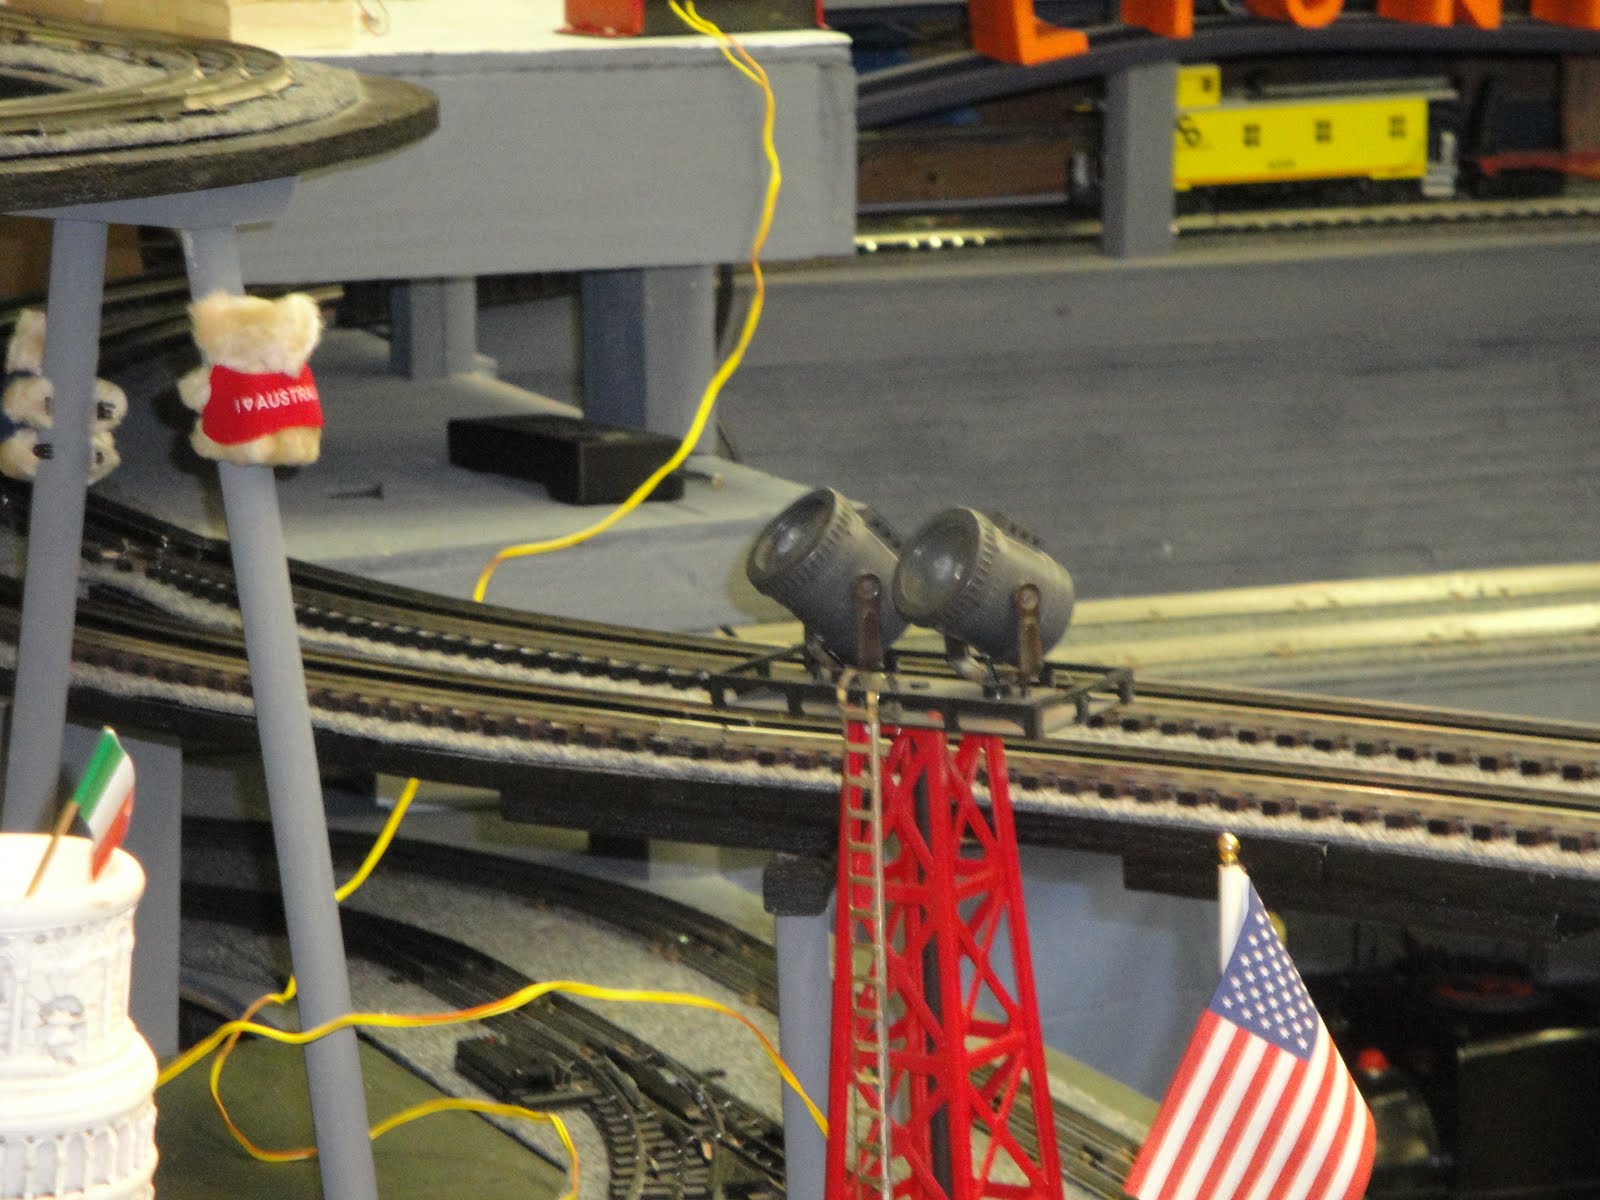
View from side of tower with sleaves over both LEDs. Notice there is hardly any light visible from the side of the LEDs.

Monday, January 10, 2011

NTS&B Subway Progress

Had a little time over the holidays, so started working on the walls around the Jamaica Station. The concrete walls are made from styrofoam sheets with the groves cut into them using a foam hot knife. The lamps were made from Model Power HO /N 12 to 16 V Wheat bulbs.


Tuesday, December 21, 2010

NTS&B Merry Christmas 2010

Another year has passed, and the layout is still in process. I'd like to wish everyone a merry Christmas, and happy and safe New Years.

Sunday, November 7, 2010

NTS&B Ya mon, the Lego Jamaica Station's open for business

When our lone construction worker finally got off smoke break, the bricks and tiles started flying like you wouldn't believe. The station was up in a flash, and now customers are enjoying the brand new sparkling clean station.

Thank you, Mr Cross. (Our lone construction worker)


Saturday, October 16, 2010

NTS&B First (annual?) Piedmont Pilgrimage

Since this was the first time we participated in the Piedmont Pilgrimage, I decided to write this note to describe our experience for anyone who is thinking about trying it in the future. We had right at 50 people attend, but it was fairly evenly spread over the 4 hours. The maximum at one time was about 10 people. Everyone was very friendly. There were discussions about their layouts and mine, and many demonstrations on the few accessories that are currently on the layout. We had 4 or 5 people (including myself, Kathy, my son and his wife, and Ron S part time) working the open house. There were 2 people stationed on the main floor guiding people and making sure everyone signed in. The other 2 or 3 people stayed in the train room to operate the layout and chat with visitors. Having 3 people is the least I would recommend, while 4 and 5 worked out really well.

The trains ran for almost the whole 4 hours, with only 2 or 3 5 minute breaks when no guests were there. Reactions to the layout was lots of smiles, a couple “Wows”, and even one highly excited “This is awesome, I’ve never seen anything like this in my whole life” at the top of the voice of one of our young club members. There were only 2 train accidents, which to my sons delight were both caused by me. Luckily no trains hit the floor, or even made it off the table. The fast acting #91 breakers were a life-saver, since they shut down power as soon as the derailment occurred, so the trains didn’t keep driving themselves right off the layout (Thanks Train Dr. Ted).

We planned snacks and drinks for about 50 people. The weather was great, so we set up the food on tables on the back patio outside the train room. Out of the 24 bottles of water, my son was the only one that drank one. Only 1 bottle of soda and 2 bags of cookies were opened, so we had way too much food and drink. Three of the 4 boxes of donut holes were devoured, but I’m fairly sure it was mostly by the ‘help’. We stopped at another layout in the afternoon, and they had a bowl of Halloween candy. That appears to be a much more reasonable approach. The good news is my wife has some extra cookies for her quilting club meeting.

The overall experience was fantastic. We had numerous small children, which were all very well behaved and supervised. A couple people even talked about wanting to come back next year. So, would I do it again next year? If we are invited again, and depending on the timing and other commitments, You Betcha :)

Friday, October 1, 2010

NTS&B Jamaica Station Lights

The Under Ground Lego Station has been re-named to Jamaica Station, in honor of the Station on Long Island. Construction of the station is underway but going slow, since there is only 1 construction worker. The LED lights are now in, waiting for the station, which may come even sooner than planned.

The lonely construction worker hard at work

A confused engineer stops at the in-process station

Panel of the station LEDs (Bottom/Front view). LEDs and fixtures are from a string of Christmas LEDs

Panel of the station LEDs (Top/Back view)

Saturday, September 25, 2010

NTS&B Does the NTS&B like Post War Trains?

Sounds like a simple enough question. But the answer kept me busy all day on 2 switch tracks. Many post war operating cars have slide shoes that pick up power form an extra set of extra rails between the standard rails (yes that makes 5 rails). These shoes hand down a little between the tracks, and some brand of switch tracks will catch the shoes and try to pull them off. So far, I used all Gargraves 0-42 switch tracks, and Ross Switches for the bigger radius switches. After having many problems with modern engines with the Gargraves turnouts, I decided to try 2 Ross 0-42 switches. The Gargraves switches have all been repaired, and I have not had problems with post war shoes on the 4 postwar cars I tested, or with modern equipment.

The Ross 0-42 switches both had the 'pull off the shoe' feature. Per Ross, the postwar power pickup shoes catch on sharp points in the black rails in the switch. Their recommended fix is to taper black rails with a file, or insert track pins and bend them down like a ramp. I decided to use pins to reduce metal filings, but ended up having plenty anyway.

I also discovered an additional feature with the Ross switches. The power rollers on my post war trains are wider than the modern ones, and kept shorting out on the switches. Per Ross website, extra power rail was used to make it easier for them to supply power through the switch. The problem is, the rails are close enough to the ground rail that the wider roller creates a short circuit. I decided to insulate and cut the extra rail. Below are slides that showed where cuts had to be made to fix both problems.

Although I can't say for certain that all shoes and rollers will now work, I can say that the cars I tested now should work an my whole layout, except on the unmodified main line switches.