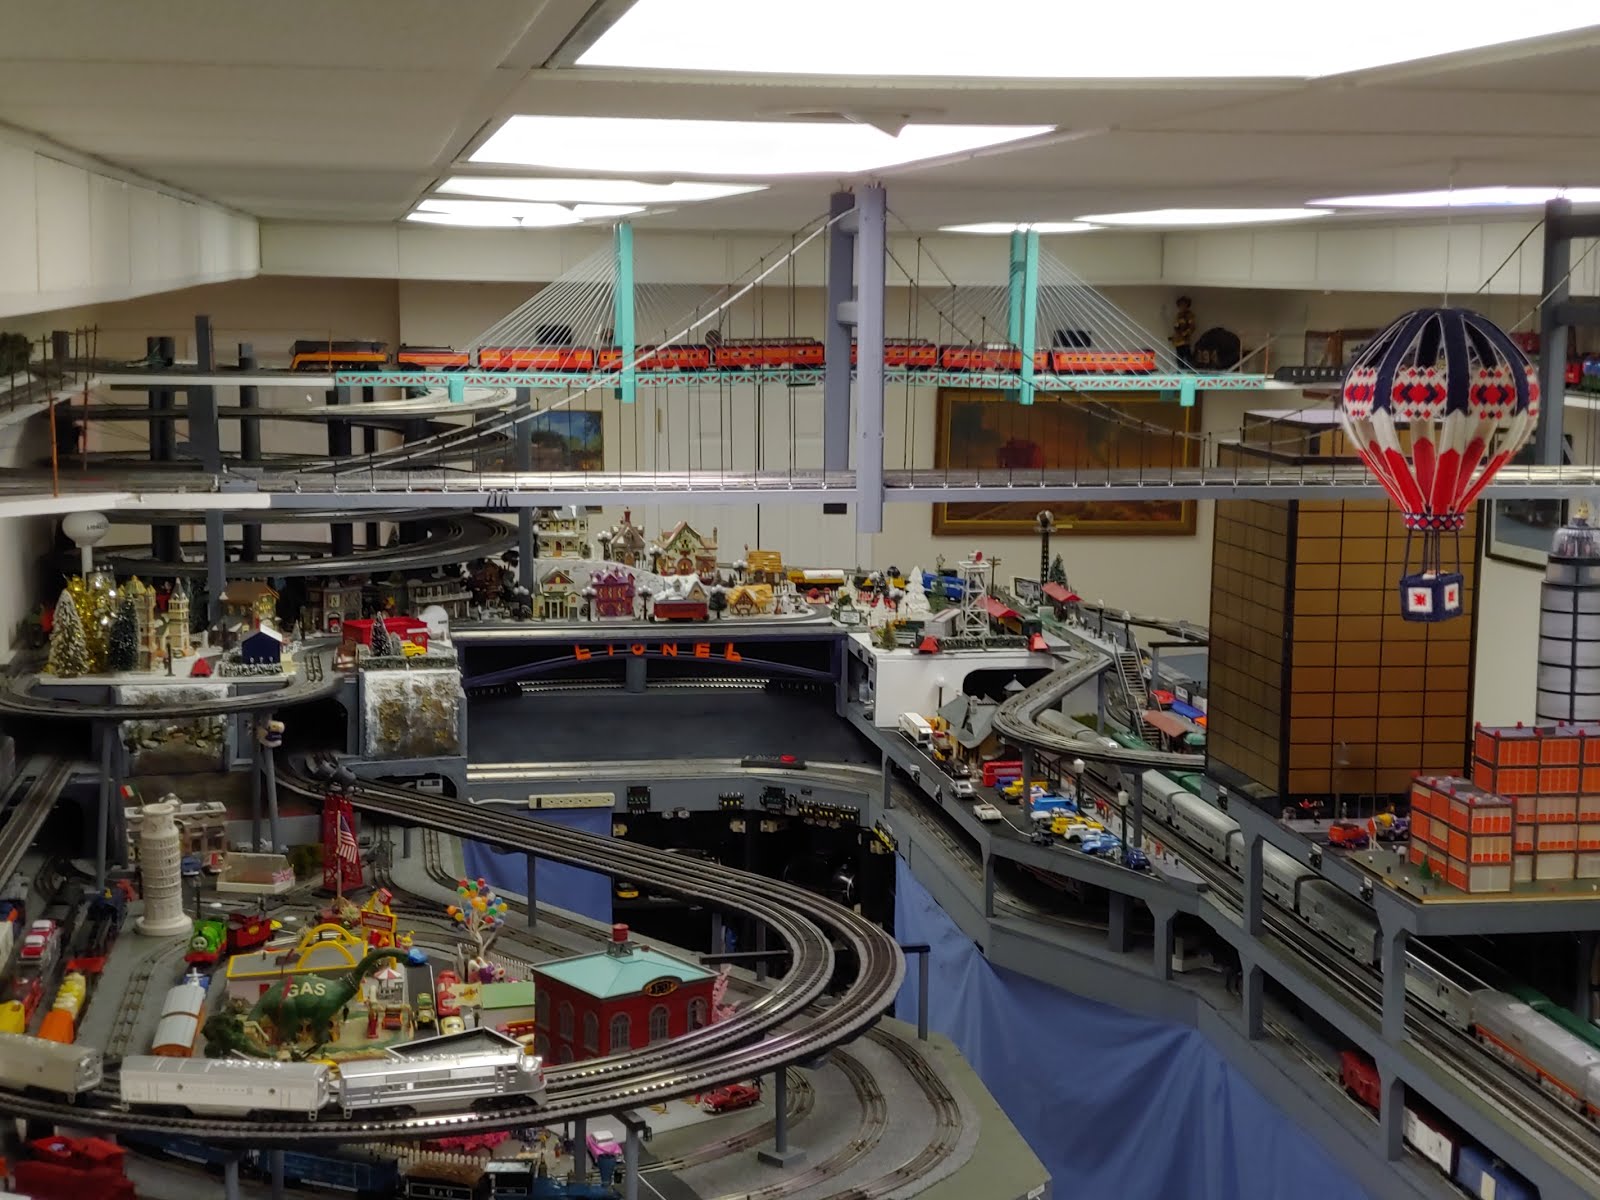
I finally got the outside loop laid in with the planned and some additional accessories. I had not planned on using the tractor trailer loader, 1950s Gantry Crane, or 1940's Coal Loader, but may be able to fit them in after all. I had to re-arrange the track plan multiple times to get the accessories to fit, but believe I finally have it. Most of the accessories will be on one side, since the other side will have the mainline running over it. Here are a few pictures of the results. Wiring will be connected later.
Thursday, June 11, 2015
Wednesday, June 3, 2015
NTS&B - New Gargraves Switch Modifications
The last 4 Gargraves switches I received had the center section redesigned from a solid coffin shaped piece to separate rails. This has caused multiple shorting issues when running 6 wheel trucks or cars with wider wheels, and uncoupling / shoe problems with cars with shoes. Below is a correspondence with Mike from Gargraves, and pictures of what had to be done to modify them to work reliably.
Original design
Note to Mike
Various problems with new design
Modifications required to switches
Modeling clay used to fill in gap
Wednesday, April 15, 2015
NTS&B Phase 5 module track layout started
I am scrambling to get something running for the train club meeting tomorrow evening. The outside loop is laid in for its final configuration. The sidings in the middle are just temporarily put in to have some place to put spare trains during the meeting. I thought it fitting that the first model Lionel GG1 from 1947 and its cars from 1948-50 make the maiden voyage.
Monday, April 13, 2015
NTS&B Phase 5 modules painted
For my first attempt at putting the final coat of paint on, I used some left over tan paint I had. This resulted in a totally too light finish. I then had to buy a quart of darker brown, which will be the final paint for this section. I used brown, because this will eventually be the fall (autumn) area. I also finished painting the small mainline extension where the light house will be located.
First attempt using tan paint
Final attempt. Blue area will eventually be water feature.
Saturday, April 11, 2015
NTS&B Phase 5 module Work Session
I had some volunteers Thursday and Saturday to help with the layout. Thursday, John L picked up the 3 sheets of plywood to cover the modules. Saturday Paul M and sons came over and we installed the plywood, and primed it. Here are the latest pictures:
New plywood has arrived
Paul Jr. Cutting out the ocean bay
Plywood installed and primed. Center cutout is for future upper and lower levels
Plywood installed and primed-view from end of layout
Friday, April 10, 2015
NTS&B Phase 5 module Track Wiring Laid In
Finally got all of the track wiring laid in from the barrier blocks for the outer 3 loops. Only about 4 of the pairs are connected to the tracks at this time. There will multiple connections on each loop. On the sidings, there is usually a connection on each end. This is to provide insurance that a week pin will not cause power problems in the future. Here are pictures of the block connectors, which will give you an idea on how many wires I have run so far. The loose unlabeled wires are temporary connections. All black wires are to the center rail of the tracks, and the green wires are to the outer (ground) wires. Control Switch and Accessory wiring have not been started.
Monday, April 6, 2015
NTS&B Last Phase 5 module
The last module of the fall layer has now been framed in. Hopefully will get plywood by the end of the week. With this 2x4 module, the overall footprint of the layout has now been laid in. Still lots more work to do. Also, have laid in quit a few track power lines for the outside loop, and established the power blocks for the 2 outside loops. Here are some updated pictures.
Wednesday, April 1, 2015
NTS&B Phase 5-Bay and forth module
The weather has not been cooperating real well this week. Seems that when ever I have a day to work on the layout, it's raining, or rained the previous night so my outside work area is still wet. To make things worse, I offered to have the club meeting here in only 3 more weeks, so I've got to really get going. I did manage to get a couple things done. The first was to get all of the supports in for the bay area. I then applied one of the oldest scenery techniques for making the water. It's commonly know as 'paper water'. It's quick to apply, and doesn't need painting (April Fools !!). I installed the paper so I would have a template to cut out the lake when I finally get the plywood installed. I also get the next 4x8 module framed in. Again, waiting for plywood, but at least I can now continue wiring if it's raining. To make room, most of the 'stuff' that was on the end of the room is now under the layout, with a few more things to cut down to fit.
Bay area supports added, and paper mockup installed.
Another 4x8 module added. Room is getting smaller.
View from other side. The big hole in the middle is where the upper level will be added.
View of overall layout
Sunday, March 22, 2015
NTS&B Phase 5-Some wiring and third module
I finished the legs, and started running wires on the new extension. While reviewing my track plan with accessories, I realized that the control panel that I had planned for the side of the table really needed to be on the end of the next table. This is because the accessories require accurate car positioning, which could not be made looking from the side. Therefore, I had to extend the wires I had already run. I did realize that it is much easier to run wires from the top of the table, instead of underneath the table. The problem is now that I feel I should put a clear acrylic top on it instead of plywood, so people can see how much work goes on UNDER the layout.
I also started the small extension on the mainline table, where the light house will be located. The cardboard and blue papers are where the bay will be located.
View from one end showing wires and lights and new module
View from other end, showing more wire and bay
Side view of bay, module, and approximate track positions.
Monday, March 9, 2015
NTS&B Phase 5 Started-First 2 modules
Finally started on the 8x10 fall (autumn, not as in fall on the floor) section. This week I started on the 1x4 transition section, and the first 4x8 table. The remaining 4x8 and 2x8 will be delayed a while until I make more room for the expansion. The 2 new module frameworks are complete, and temporary legs holding them up. The legs will be connected and the module fully attached to the rest of the layout this week (when I am able to move again). Hopefully, the plywood table top will follow next week. Here are pictures of the progress so far.
02/08/2015-Step 1-Move kitchen table out to make room for extension
Day -1-Demolition (no-didn't use sledge hammer)-disassemble temporary table on end of layout
Day 1 - Transition module complete
Started main table. Ran out of daylight
Day 2-Framing complete for main module. Legs temporarily balanced underneath.
Overview picture of layout showing new foot print
Subscribe to:
Posts (Atom)