Monday, February 4, 2013

NTS&B New overhead loop bridge plans A through C

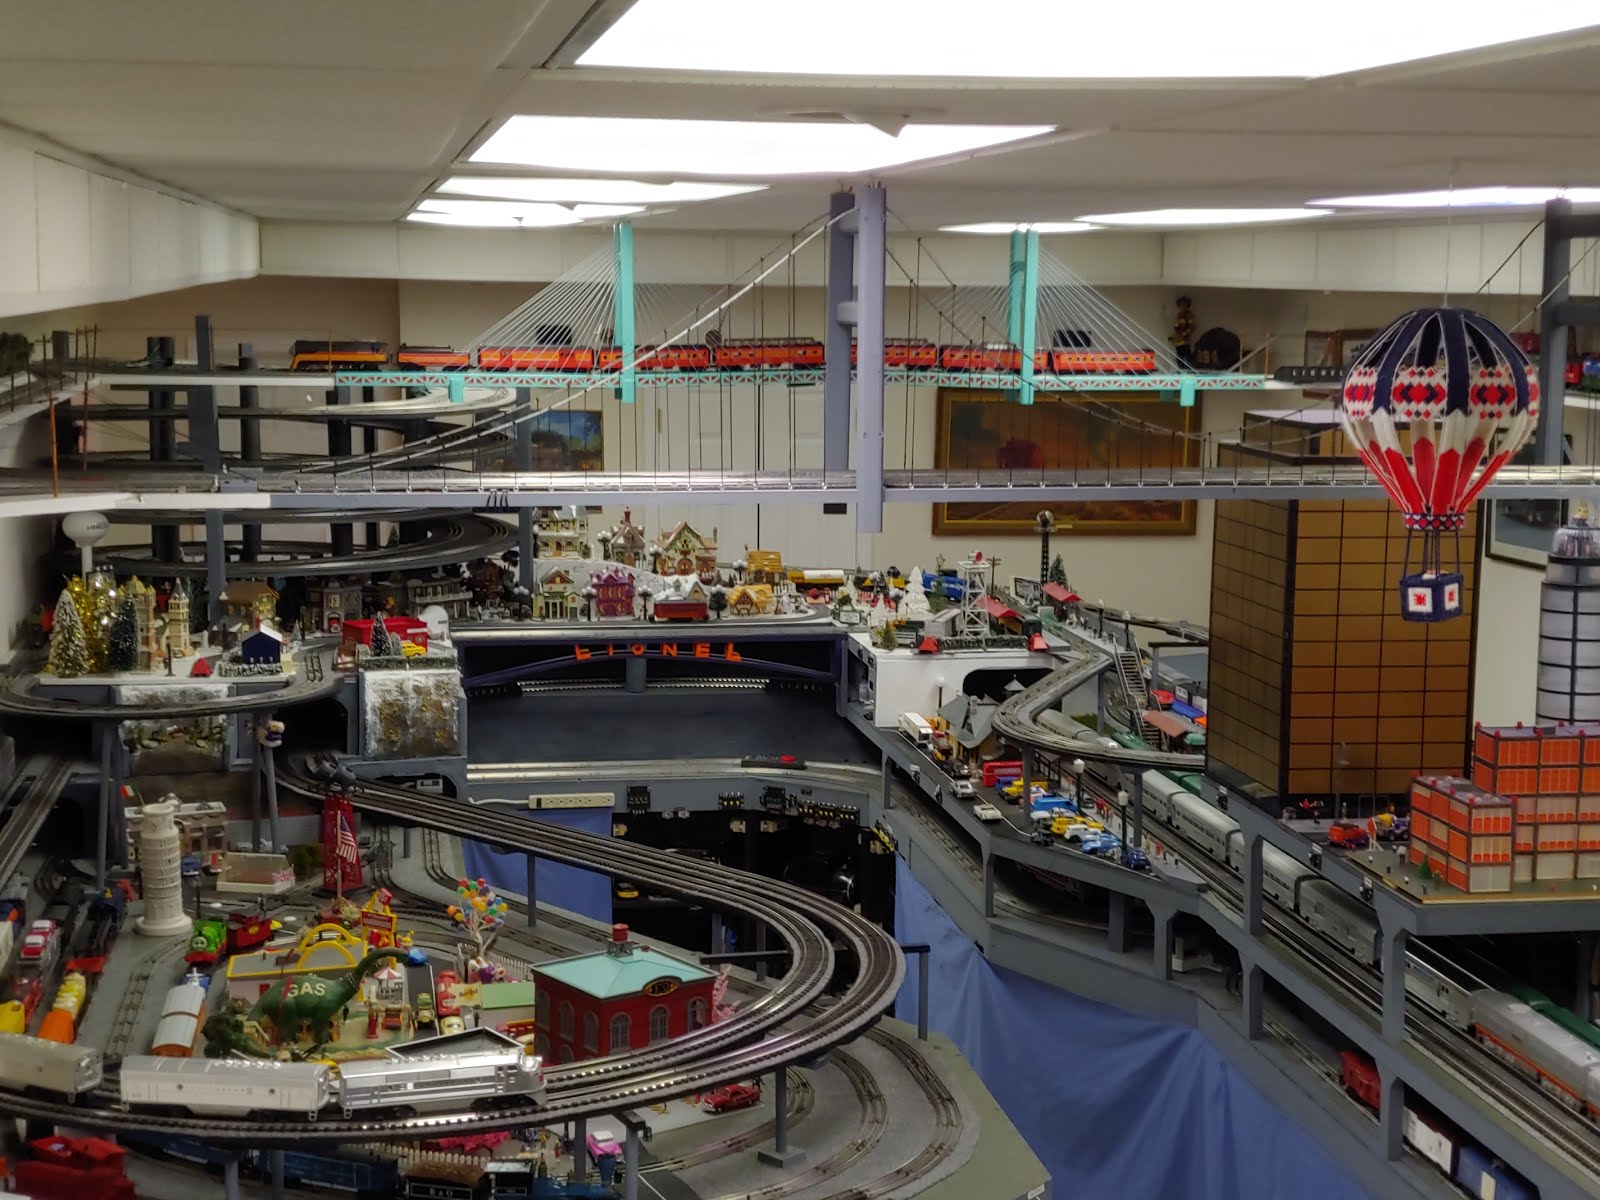
 I finally got some time to work on the new ceiling loop bridge.  The original attempt (plan a below) was a little too plain for my liking, so I came up with the idea to add an arch after seeing a foot bridge of similar design.  I wanted a fairly low arch since the bridge is supposed to be low to the water and has many supports.  My first attempt for the risers (plan b below) was using the vinyl cord that is used to string beads.  The cord was too 'sticky', and could not be adjusted easily.  This ended up making the arch way to flat.   The final idea (plan c below) was to use 1/8 inch dowels for the risers, which I believe worked quite nicely.  The bridge is now complete, but I still want to put a scene underneath it.


Plan C-Bridge with Arch and dowel risers

Plan B-Bridge with Arch and Vinyl Cord

Plan A - Plain Bridge

Wednesday, December 26, 2012

NTS&B Merry Christmas 2012

Another year has passed, and the layout has not progressed much. I'd like to wish everyone a Merry Christmas, and Happy and safe New Years.  This year we had family down in shifts, so celebrated multiple Christmas's.  Here's a couple pics of the grand-elves at the Lights Of Life.


Saturday, October 20, 2012

NTS&B 2012 Third Piedmont Pilgrimage Open House

My third Piedmont Pilgrimage turned out to be just as enjoyable as my other two. Kathy was not able to be home, so I had 4 full time helpers, and 2 additional club members came about half way through and helped.  All told, I had 57 people plus myself, which is the biggest crowd ever.  We had 2 families come back for the second year.  The furthest visitor drove 67 miles, unless you count the couple from PA (700 miles), which was already in town visiting family.  Snacks consisted of pre-Halloween candy and drinks, and very little of that was gone.

A good friend who helped also brought me a nice addition to the train room.  One of his hobbies is carving pumpkins.  He carved this pumpkin for me using a Dremel tool.  I believe he said it took him 8 hours, and his hands were still vibrating !!!  Its even more special since its a picture (sculpture?) of the Polar Express, which is the main train reserved for the helix loop.


I also took a little time the week before and worked some more on the new bridge.  Its not complete yet, but it looks a little more like a bridge with the moorings attached, and the NTS&B letters applied.  I've been told I may see something similar on another layout in the near future.


Sunday, September 2, 2012

NTS&B Starting Year 6

Its hard to believe that I started the first (non helix) module of the actual layout 5 years ago. Last year didn't see a lot of progress due to finishing the other room. I mainly worked with adding buttons for lighting, adding controls for the Spring Loop, building 2 power stations, and shelves and controls for remainder of upper loop. This year I'd like to finish up ALL of the subway and new upper loops scenery and lighting, and get the some more bench work done. Below is some recent progress on new upper loop bridge.

Sunday, August 5, 2012

Track Inspection Train on the NTS&B - Updated

A screw came out of an engine I recently purchased, so I had to search the Helix Loop trying to find it.  After looking for a while using a ladder and flashlight, I decided there must be an easier way.  The camera car that I helped Train Dr Ted build worked well, but did not shed enough light close up, so I had to add another light car to the mix.  I had to use a TMCC engine so I could stop and start it without affecting track power which also powers the camera.  Although I still didn't find the missing screw, it was sure a lot easier this way than lugging a ladder around and crawling all over the layout.  Here's a couple pictures to demonstrate the process.

TMCC Controlled GG1 pushing search light car and TV Camera Car

Me diligently searching for the missing screw

Since I hadn't found the screw I decided to revisit Plan A to find the part, which was to use a magnet on attached to a train car.  My original idea was to set the big magnet I had on top of a flat car.  The car was too high, and it would not pick up anything.   I then looked for smaller magnets that I could mount underneath the car, but didn't have any.  I was discussing my problem with a friend, who mentioned that it was too bad I couldn't hang a magnet off the front of an engine.   Although I wouldn't hang one off an engine, it did give me the idea of hanging one off the back of a car.   Although it was very crude and I had to make adjustments so it would clear the helix, it turned out to be effective and I found the screw.  After that it also dawned on me that I could have used a depressed center flat car. 


Monday, July 23, 2012

NTS&B Phase 3-A Little more progress

After working all weekend, finally got the shelves all cut out, painted, holes drilled for telephone poles, and most of the wall brackets up.  The top picture shows what the new bridge will look like (without the clamps).  Not sure it's really what I was hoping for at this point. Might have to do some more figuring.  Still have a long way to go before I even can lay track.


Sunday, July 15, 2012

NTS&B Phase 3 Started


 Phase 3 is finally started.  It is very significant, since the last bench work was completed in July 2010.  It currently doesn't look like much, but I spent about 12 hours doing the unseen work, like taking down the G Scale track, running power up to the top, changing the helix power control so the helix feed in track can be selectively operated by the new Ceiling transformer, and putting up a couple shelf brackets,  More to come next weekend, I hope.


Monday, June 11, 2012

NTS&B M&M Home

Last year my daughter gave me some M&M people for the layout. They appear to have been off a sting of Christmas lights. Although it may take a while, I always try to incorporate gifts form the kids into the layout.  At the time, I had an idea of making them a 'home' next to the Underground Lego Station.  I forgot about it until this weekend, when I was working on some other wiring in that area.  Here's a couple pictures of the results.  Although their room is quite big, the door is small so its' heard to see them all in it from 1 angle.  The room is lit by a push button controlled light, which makes the yellow M&M appear to be wearing stripes,  Still need to put the door casing on to finish it up.


Tuesday, June 5, 2012

NTS&B Spring Section Controls

Worked most of last weekend setting up the switch track and track power controls for the Outside 2 loops in the Spring section.  The big toggle switches over the transformer are used to select the ZW power, or the 1 extra Remote Track Power Controller that can be used for debugging track problems, or just running a train remotely.  A similar module was created for the Subway when I first started out, bit this one is much simpler to create and hang.   Eventually (hopefully in the near future), the Subway one will be replaced, and one will be added to the Heliz/Winter loops also. Here are some pics of the control panel, and the latest overall layout.


Wednesday, May 30, 2012

NTS&B Spring Power Stations

I finally got time to build a couple new power stations for the 'spring' section. Actually, the one on the right is for the 2 outside loops.  The one on the left will be for the center most loop, and the newly planned ceiling loop that will be above it.   It took most of the 4 day weekend to get them painted, assembles, and placed.